Web host manager (WHM) is a powerful program which helps the user to manage/gives control over multiple cPanel based sites and also provide administrative access to the back end of cPanel.
For creating a new cPanel account in WHM under a reseller it is essential that we need a package so that we can avoid defining a number of settings manually every time when we create an account.
PACKAGES
Packages in WHM is a set of pre-defined settings which WHM uses when creating an account. We were able to select the package during the creation of a account.
1.Creating a package in whm.
Normally login to the root WHM of the reseller account.
There is an option called Add a package in the whm homepage.
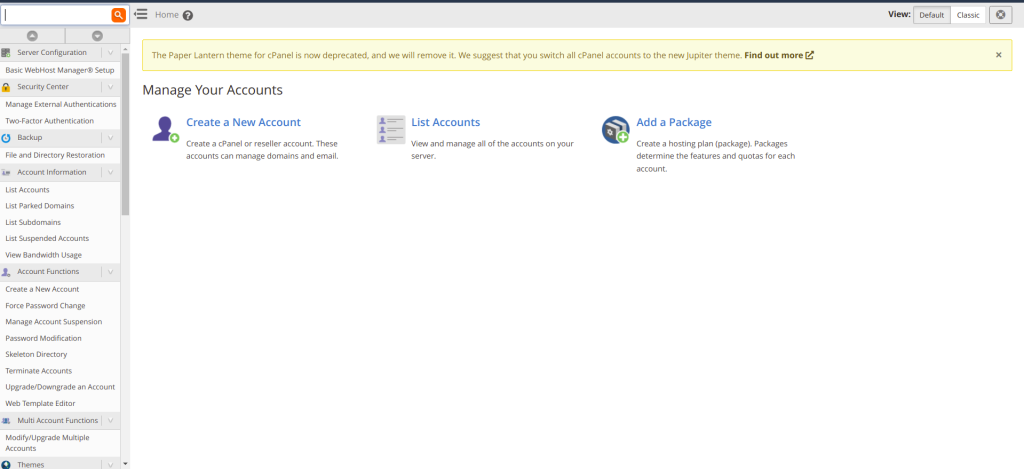
Click on Add a package and there you can set the name of the package, various options and limits according to our needs.
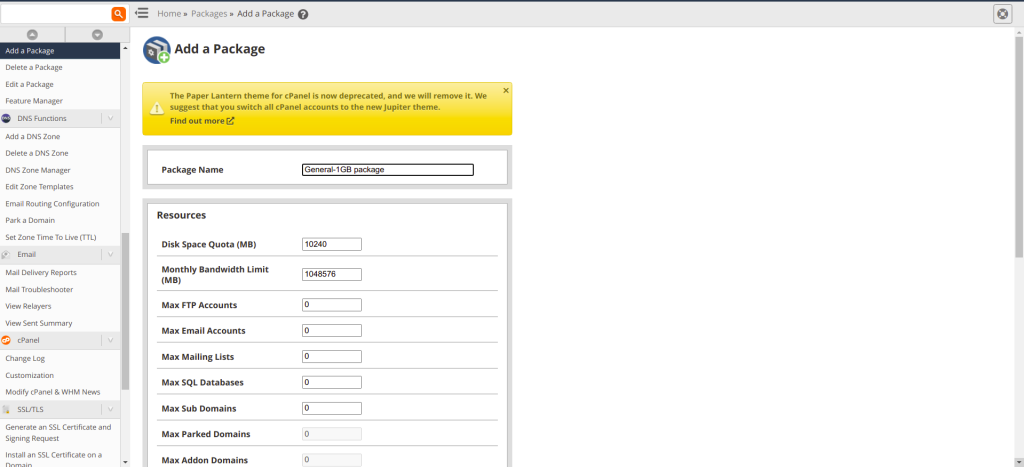
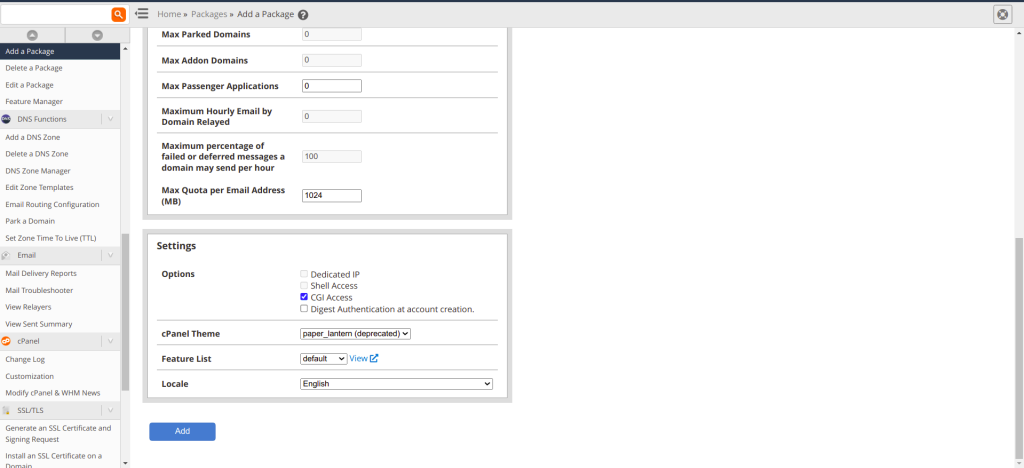
You can input the desired values for each field and a value of 0 represents unlimited.
PARKED DOMAINS: Parked domains are reserved registered domains which is not associated with any specific website and it displays a parked page to the visitors who visit the URL.
ADDON DOMAINS: Addon domains are fully functional domains(domain name’s should be registered) that can be created from your cPanel. It is like multiple hosting packages sharing a common cPanel.
Click on Add and your package is now created. You can use this package for creating accounts with these pre-defined settings.
OVERSELLING
Overselling means that you can allocate resources to the user’s but not able to create new account if the resource exhausted.
If overselling is enabled the reseller is able to allocate more resources to the existing user’s but if the resources are exhausted the reseller can’t be able to create more accounts.
For example:
A person named X has an account with 1000 MB of disk space and enabled overselling. Then X sets disk space of 100 MB to twelve users. Now the total disk usage is 1200 MB. They still works fine but X can’t be able to create new accounts.
These are the very basic operations which can be performed using very simple and minimal steps in WHM.
Login to your WHM with the provided credentials.
2.Adding a account.
After logging into your WHM you can see a CREATE A NEW ACCOUNT option in the home screen.
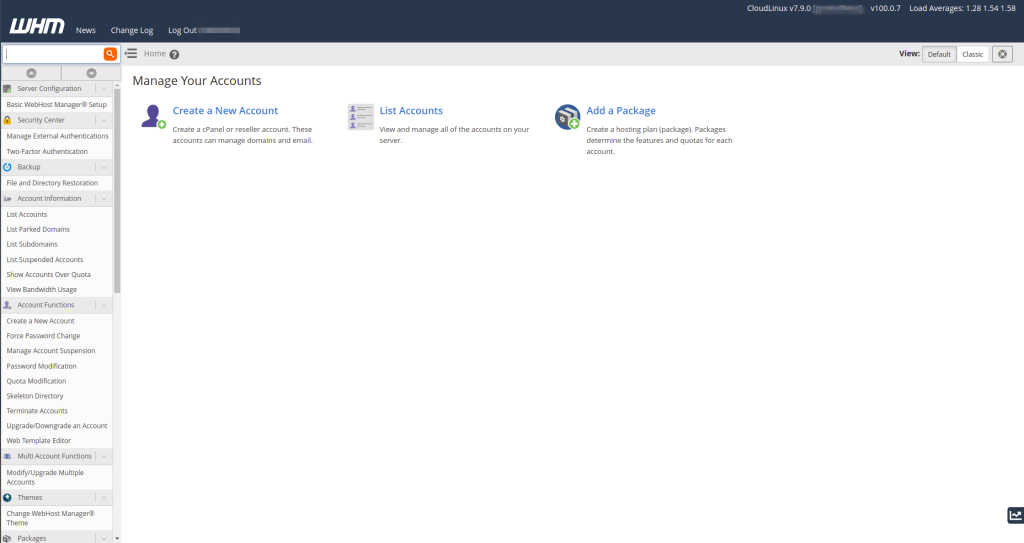
After clicking the button you are requested to fill the basic necessary details.

Here we can complete this in 5 easy steps.
STEP 1 : Enter the domain name.
STEP 2: Enter the desired username for cpanel or simply click on the test box it will suggest a username for you.
STEP 3: Enter a desired password for your cpanel account.
STEP 4: Instead a entering a desired password you can use the password generator which will give you a strong password with a mix of alphabets , symbols and numbers.

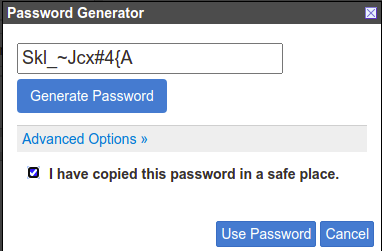
After copying the password to a safe place you can click the check box and click the Use password option.
STEP 5: Choose the package.
After completing the above steps click on CREATE button and the account creation will be started automatically.
3. Removing a account from WHM.
After logging into your WHM you can see a LIST ACCOUNTS option in the home screen.
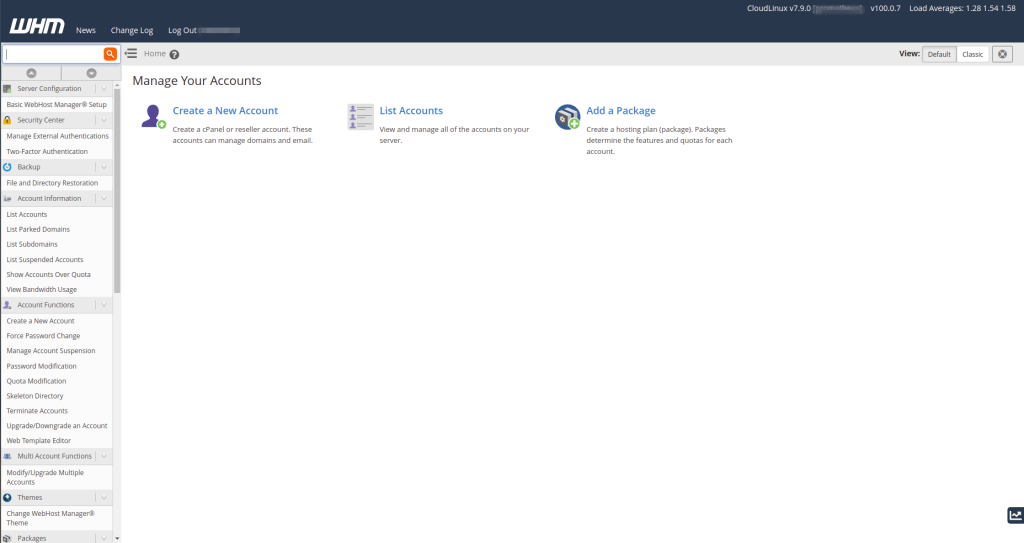
After that type for the domain name in the search field and click on FIND.
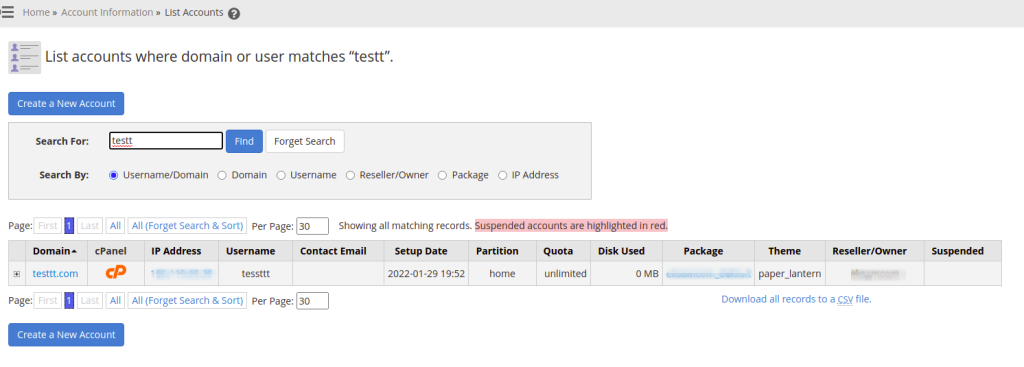
Here you can see the result of the search.
After finding the domain from the list we can proceed with the deletion.
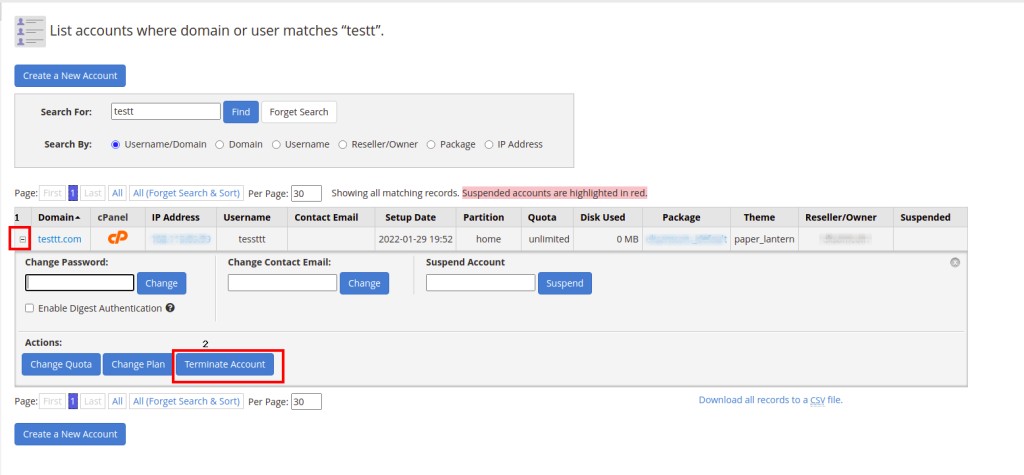
STEP 1: Click on the + button on the left side of the domain name.
STEP 2: Click on the TERMINATE ACCOUNT on the bottom of the appearing menu.
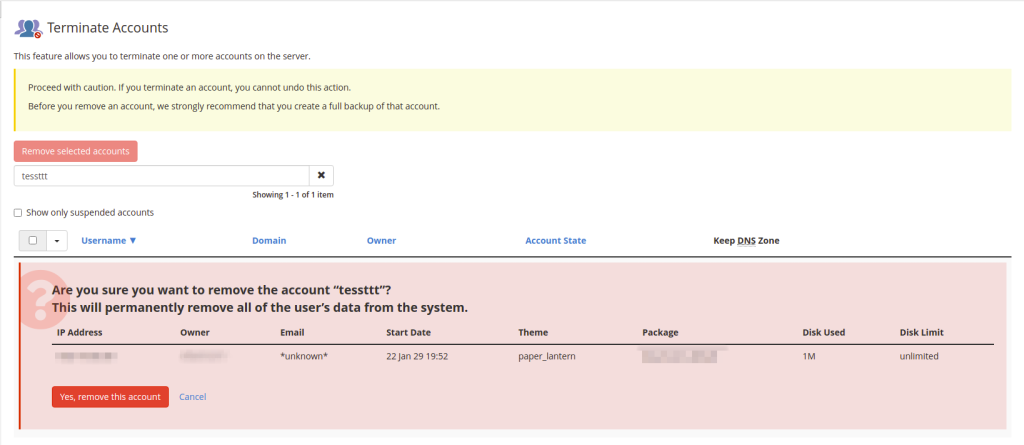
Now click on YES, REMOVE THIS ACCOUNT the account deletion will be started automatically.
It will show a success message on the top right corner if the account successfully removed.


 Sam Sunil
  February 19, 2022