Installing custom magento version in a cpanel server.
 Sam Sunil
 April 29, 2022


 Sam Sunil
April 29, 2022
Sam Sunil
April 29, 2022
We are going to talk about installing magento version 2.3.0 here, as the latest version of magento is 2.4+.
For installing the latest magento version we don’t need to specify the version in the installation command but for installing a custom version we need to specify the version there.
For installing magento version 2.3.0 first we need to set the requirements for the version.
The requirement mainly include
Php version 7.0 to 7.2

A domain

Some php extensions enabled like "mbstring" , "zip" etc..
First connect to the server via SSH and switch to the user.

After that move to the location where you need to install magento preferably the document root of the domain.

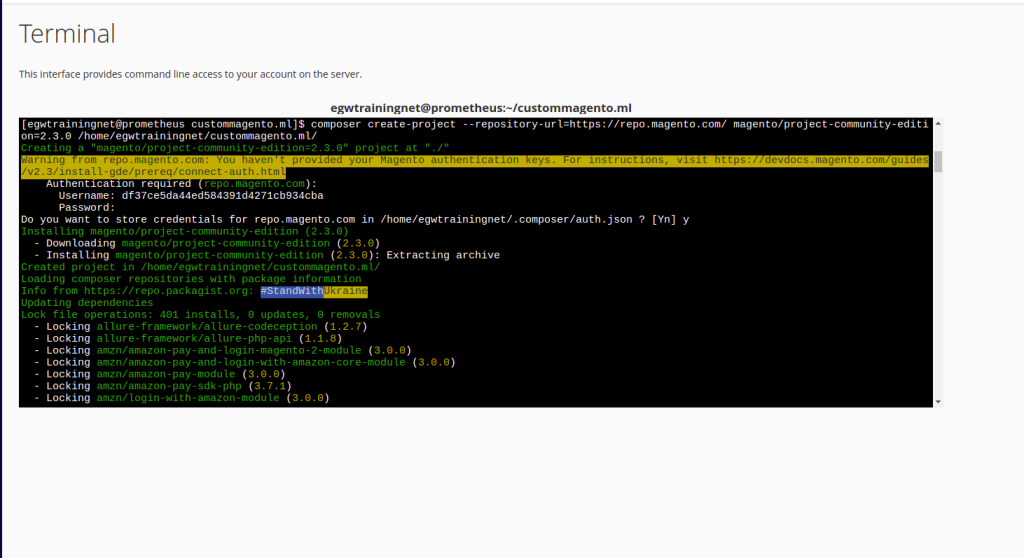
You can use terminal by connecting via ssh and switching to user as shown above or use the terminal in your cpanel.
Then enter the below given command to get the desired version.
"composer create-project --repository-url=https://repo.magento.com/ magento/project-community-edition=<specify the magento version> <install-directory-name>"

*specify the magento version : Give the desired magento version there
eg: 2.3.0
*install directory name : Give the path where you install magento
eg: /home/user/public_html
You can replace the spaces in the command by referring to the above block.
In some cases it will ask for a authentication as to enter the username and password.
For this you need to go to the magento webpage and needs to create a account if you don’t have any or just login if you have a account with them
URL : https://account.magento.com/After logged in go to the top right corner where shows your name and click on my profile
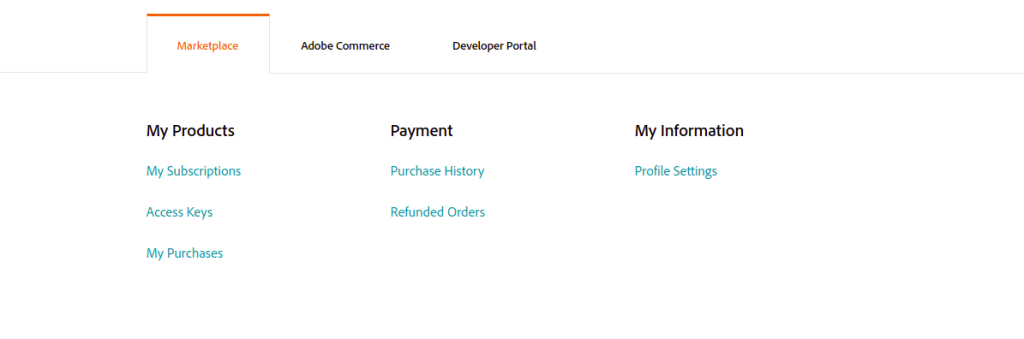
Then click on Create a new Access Key, Here you can manage your access keys.

There you will be provided with a Public key & Private key.
Pass the PUBLIC KEY as USERNAME.
Pass the PRIVATE KEY as PASSWORD.
After that you will be prompted to enter a Y/N pass Y over there to create a Auth.json file to avoid this step for doing everytime.
It will start gathering the files of the specified version for us now.

Wait for some time to complete the process.
On successful completion it shows like.

There may be higher chances to generate some issues of file permission and ownership.
For fixing this run the following command in terminal by staying in your document root.
find . -type f -exec chmod 644 {} \;
find . -type d -exec chmod 755 {} \;
chown -R :<web server group> .
chmod u+x bin/magentoTo complete the installation the rest steps can be done via a browser.
1.Call your domain from any browser.
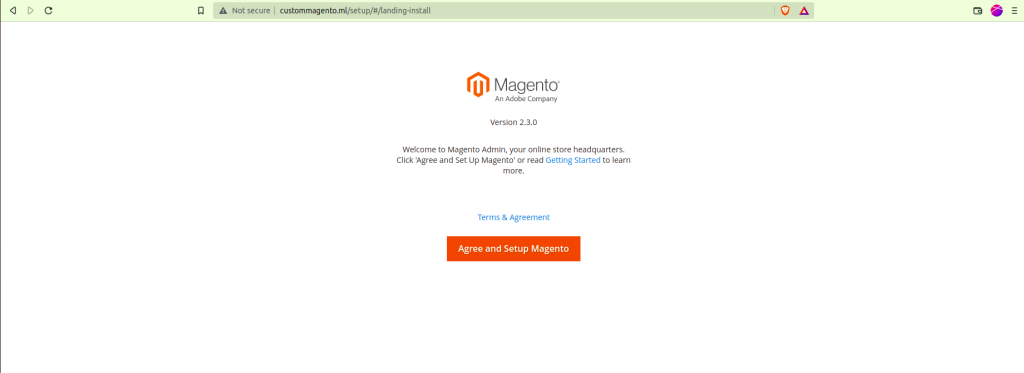
2. Click on the button Agree and setup magento.
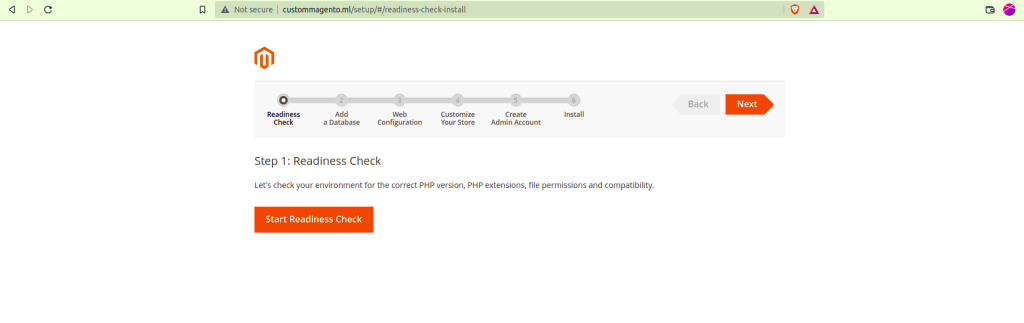
3.On clicking start readiness check it will automatically check for the availability of necessary environment setups.
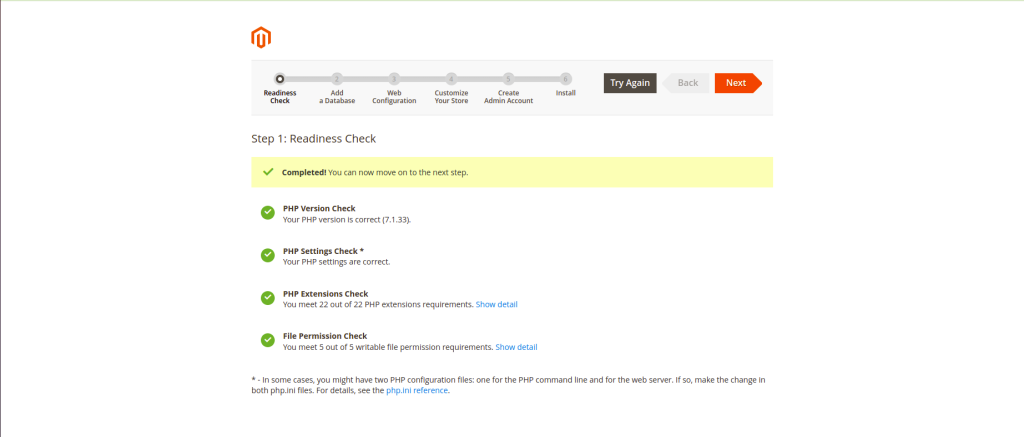
4.Now click on next. If any error or something is missing it will be show up here in detail you can work on it and click on Try again to run the check again.
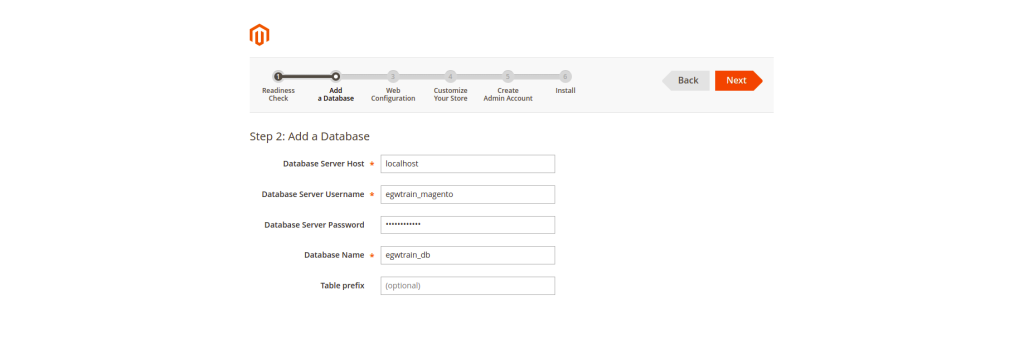
5. Add the database details like username password and Db name here. You can create a new database using either cpanel or terminal.
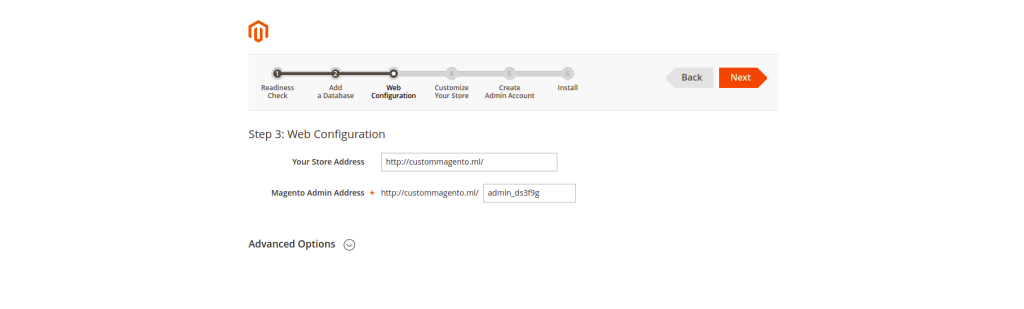
6. configure your URL and admin URL here.
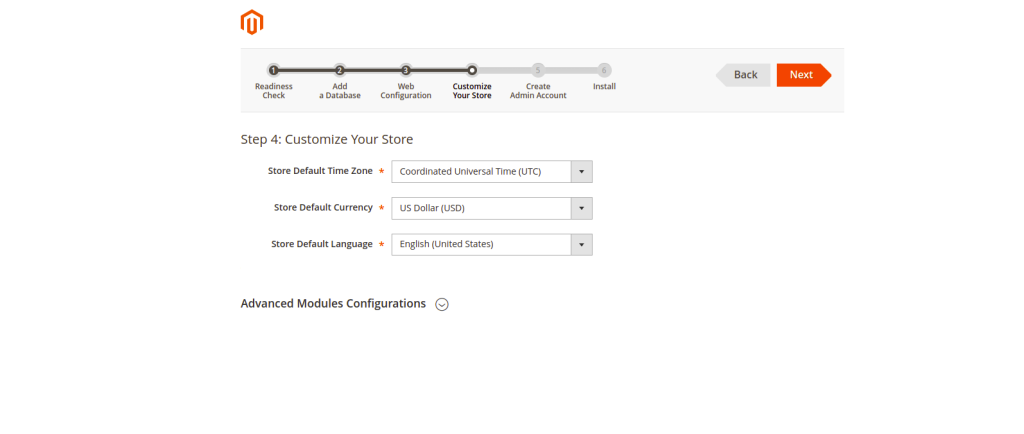
7. Customise your store like default time zone and the currency in this page.
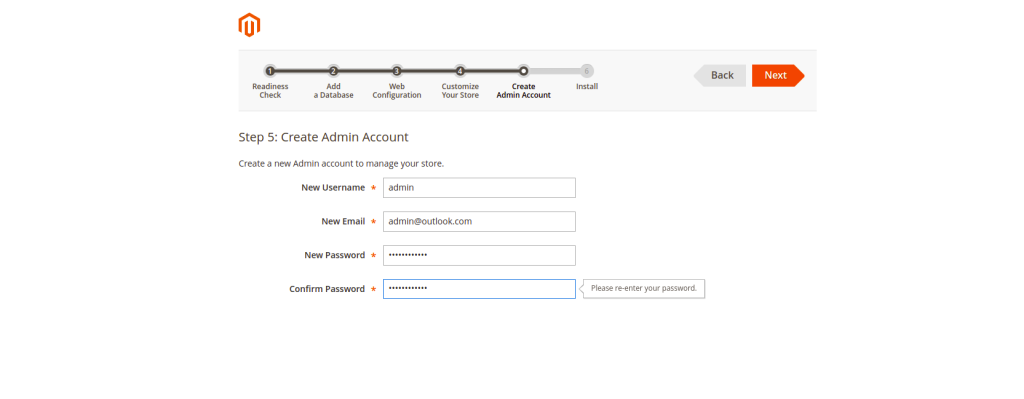
8. Configure your ADMIN account details over here.Like username and password for login to your admin area.
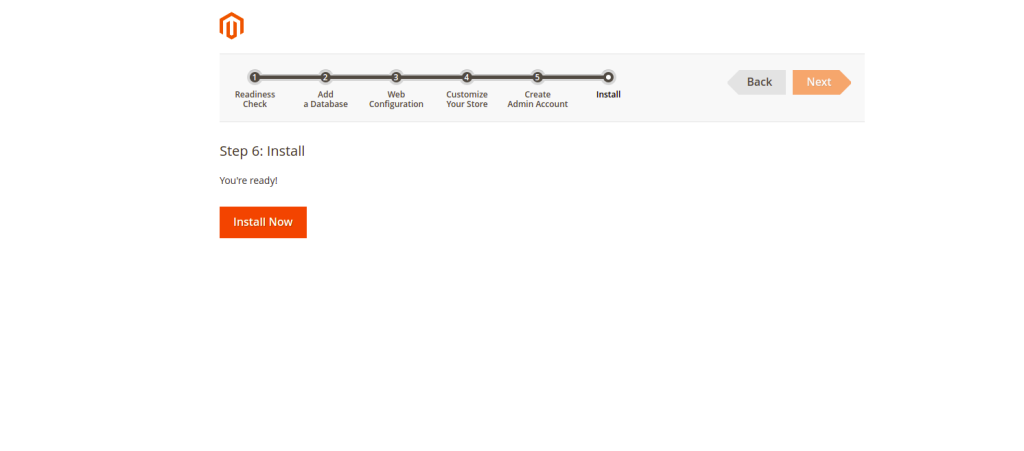
9. Now click on Install Now to begin the installation. You need to wait for some time to complete the installation. Also there is a console log output present in the installation screen which helps in debugging if any error pops up.
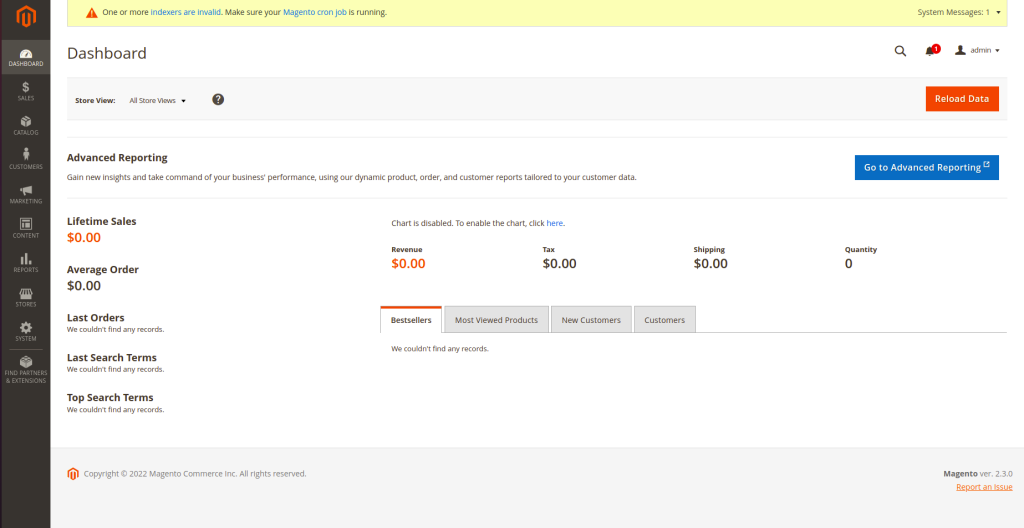
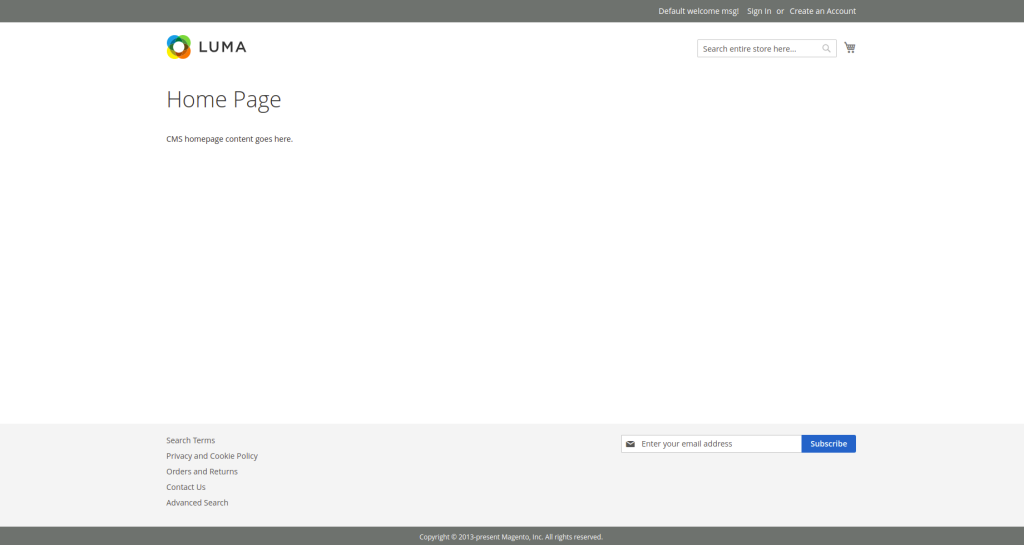
10. After successful completion the page and the admin area will looks like this.